The Electra Forums

Guitar Talk about Electra and other vintage imported guitars
Home
Index of Models
The Electra Forums
PM Inbox
It is currently Fri Sep 20, 2024 5:27 pm

All times are UTC - 8 hours


Post new topic Reply to topic  [ 39 posts ]  Go to page 1, 2, 3  Next
Author Message
 Post subject: x140 rebuild
PostPosted: Tue Sep 06, 2011 6:10 pm 
Offline

Joined: Tue Jul 13, 2010 2:08 pm
Posts: 312
Location: Nashville, TN
I recently purchased an x140 (possibly the deluxe or custom) and it needs some work. Someone apparently gutted the electronics, cut the pickguard, and it appears to have been repainted several times. With that being said, I'm going to need a wiring diagram along with a pickguard tracing. Part of the pickguard is still there, so if I can't get the full tracing, at least the top portion is needed. Any help would be appreciated.


Top
 Profile  
 
 Post subject: Re: x140 rebuild
PostPosted: Wed Sep 07, 2011 7:04 am 
Offline
User avatar

Joined: Thu Feb 07, 2008 5:52 am
Posts: 1938
Location: Ann Arbor, Michigan
I'm not convinced that is an original pickguard, something doesn't look right (and I don't mean the flat top), but who knows, I guess you'll find out when you take it off and count the number of holes beneath it.

The wiring diagram should be pretty straight forward, with a three way selector controlling the Bridge and Neck pickups, and the micro dedicated to the Center pickup on and off. This is a nice setup giving you six different pickup combination's possible, the only 'strat' option not available to you is Center only, but you get two tones you can't get with a strat: Bridge/Neck together and all three on at once, pretty cool! I'll try to dig up a diagram for two single coils with a three way (although I'm sure you could unearth one on the interwebs!). Good luck, Mike.

_________________
Electra Guitar Videos ===> http://www.youtube.com/user/mjm33mjm?feature=watch


Top
 Profile  
 
 Post subject: Re: x140 rebuild
PostPosted: Wed Sep 07, 2011 8:48 am 
Offline

Joined: Tue Jul 13, 2010 2:08 pm
Posts: 312
Location: Nashville, TN
Ahhhh......I was under the impression that middle on the 3-way was for the middle pickup only. This changes things. I see how this is a better arrangement. I'm looking for a diagram but can figure it out if needed. I just didn't want to think that hard.


Top
 Profile  
 
 Post subject: Re: x140 rebuild
PostPosted: Thu Sep 08, 2011 9:18 am 
Offline

Joined: Sat Feb 20, 2010 7:54 pm
Posts: 421
Are you going to make a three-ply pickguard?


Top
 Profile  
 
 Post subject: Re: x140 rebuild
PostPosted: Thu Sep 08, 2011 9:31 am 
Offline

Joined: Tue Jul 13, 2010 2:08 pm
Posts: 312
Location: Nashville, TN
Jack,

I will probably make a 3-ply. I still have some 3-ply material in my parts bin. I do think the original was 2-ply though.


Top
 Profile  
 
 Post subject: Re: x140 rebuild
PostPosted: Thu Sep 08, 2011 11:17 am 
Offline

Joined: Sat Feb 20, 2010 7:54 pm
Posts: 421
I think all of my deluxe '81 Phoenixes --- blue, black --- have at least a two-ply black-white pickguard.

Depending on how long you are willing to wait, I was going to throw some different pickups into an X-140 I have that has really weak stockers. I could trace it for you at that point.


Top
 Profile  
 
 Post subject: Re: x140 rebuild
PostPosted: Thu Sep 08, 2011 11:41 am 
Offline

Joined: Tue Jul 13, 2010 2:08 pm
Posts: 312
Location: Nashville, TN
Jack,

I truly appreciate it. I have some other work that needs to be done before I get to the pickguard. Seeing that I have no other tracings, I will gladly wait for yours. Thank you very much. By the way, what type of pickups are you putting in?


Top
 Profile  
 
 Post subject: Re: x140 rebuild
PostPosted: Mon Sep 12, 2011 6:33 pm 
Offline

Joined: Tue Jul 13, 2010 2:08 pm
Posts: 312
Location: Nashville, TN
Alright, I received the guitar today. I have to say that this was the worst packing job I have ever seen. The guitar was put in a box and loose paper towels (industrial kind) were placed all around the body. When it reached my front door, the tape had come almost completely undone from one side of the box and the guitar was about to fall out. I will definitely leave appropriate feedback for the packing.

The guitar was intact despite the seller's packaging or lack thereof. The condition is what was seen in the auction, the seller was accurate there. The auction pics can be viewed here: http://www.ebay.com/itm/190570210254?ssPageName=STRK:MEWNX:IT&_trksid=p3984.m1439.l2649#ht_6996wt_1189 There was overspray (over-roll really) on the back of the neck and the neck plate had been rolled over as well. The first thing I did was plug the guitar in and I had sound out of all 3 positions.

I will attempt to group items below and describe them as best as I can. Despite the findings listed below, the guitar is far from junk and should be back in working condition with a fairly small amount of work.

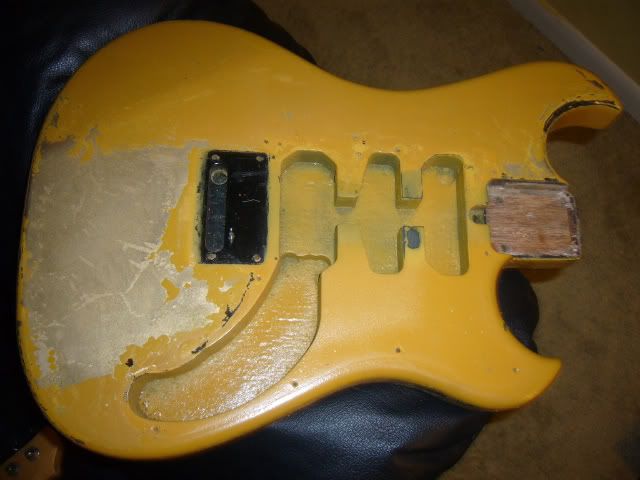
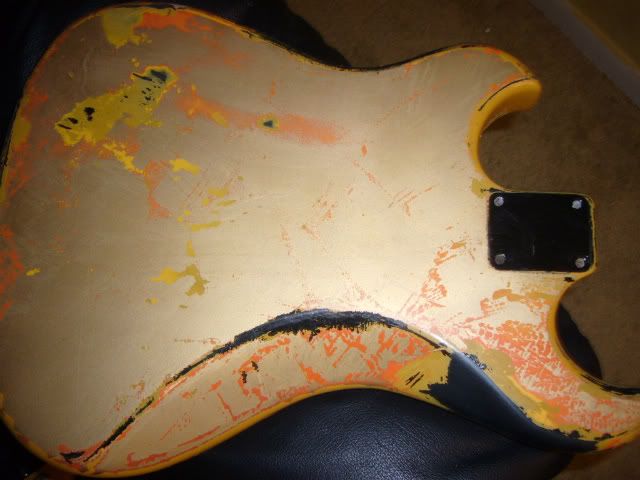
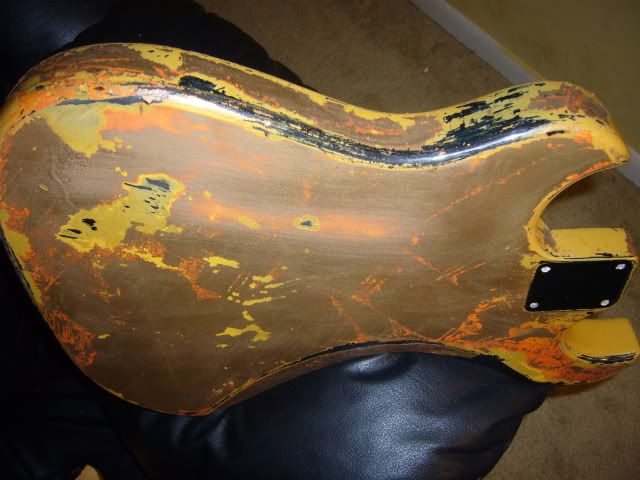
PAINT After inspecting the guitar and performing some light scraping with a fingernail, I found that the guitar had been painted 4 different times. The original color was black, followed by a gold flake, then flourescent orange, and finally a yellow-cream acrylic latex roller job. After performing some more paint removal, I can say that the original refinish to make the guitar a goldtop was well done except it doesn't appear any sanding was done on the original black.

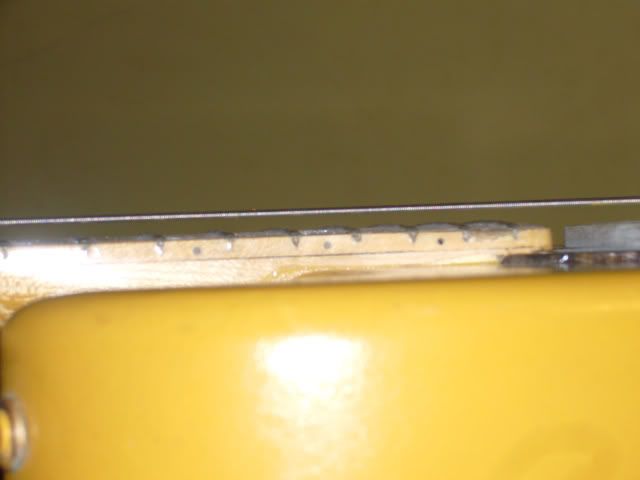
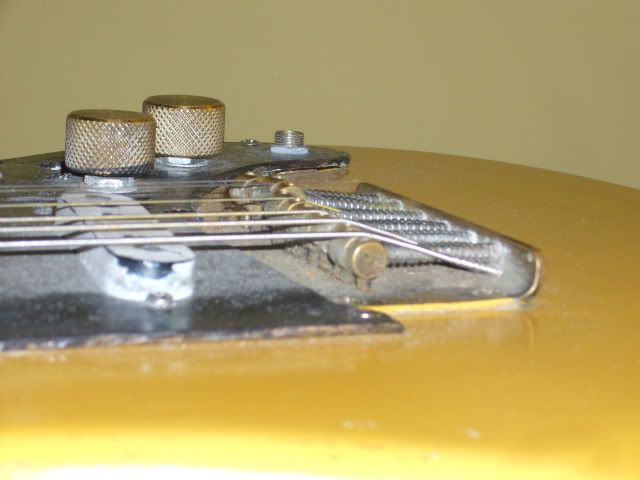
ACTION The seller stated in the auction that the action was high. The truth of the matter is that the action was simply set high at the bridge. I'm not sure why this was done but I suspect it was because whoever had this had no idea how to set the action.

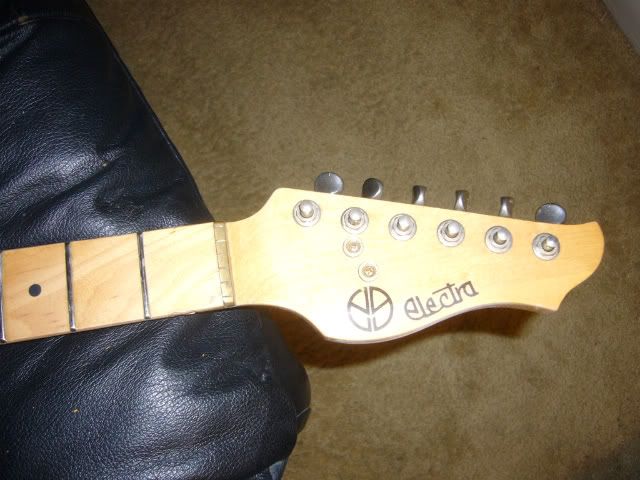
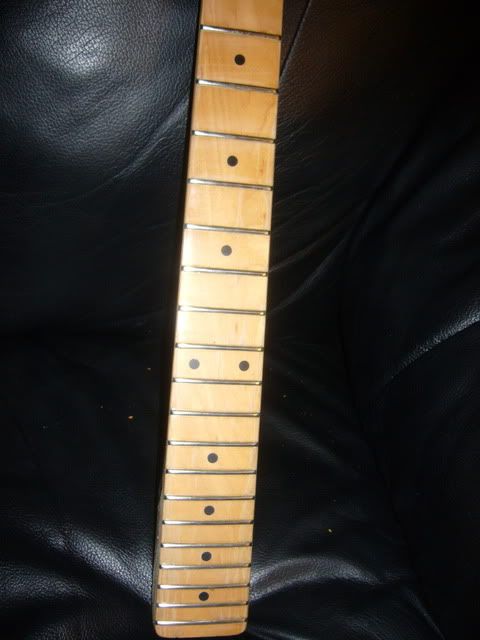
NECK The neck is in good shape. There is one ding by the first fret on the bottom of the neck but other than that, it is in good shape. There was some paint on the back of the neck as stated earlier, some grime on the fretboard and also some grime on the headstock that made the logo look like it had a problem. A little rubbing with 0000 steel wool took care of all of these issues. The tuners are all smooth and function properly. I do have one question about these necks. It looks like there is some cracking on the maple fretboard. Was lacquer used on these necks or was it poly? I haven't seen poly crack in this manner, but there is a first time for everything I guess.

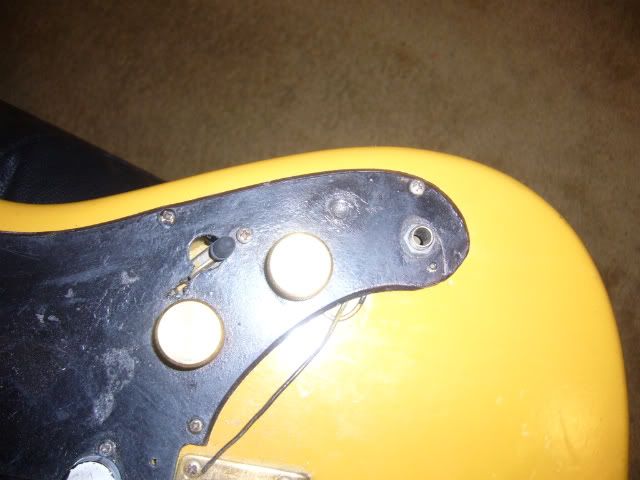
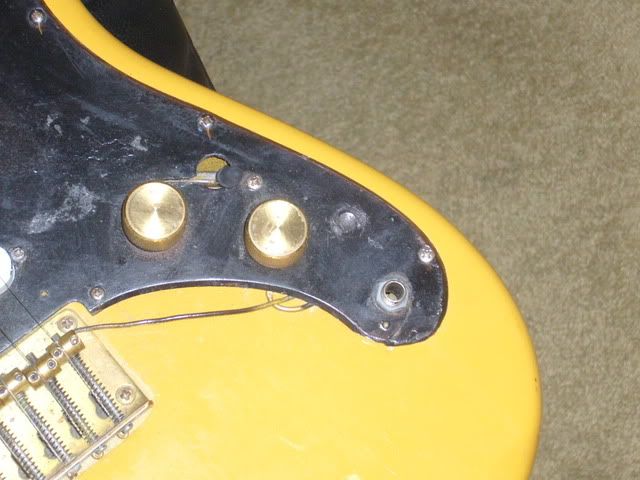
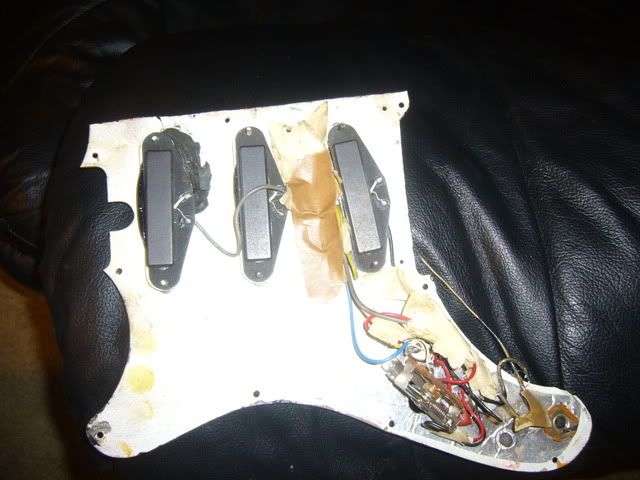
PICKGUARD/ELECTRONICS What a joke, seriously! The original fat switch was removed and the hole was filled with some sort of putty. The pickguard was then butchered at the top, and apparently the person who did it also cracked the pickguard around the neck pickup. This too was doctored with some putty to hold the pickup in place. A 3-way switch was then added in the 3-way toggle hole. This engineering was pure genius. To top it off, a nice layer of black paint was applied over the putty filled pickguard.

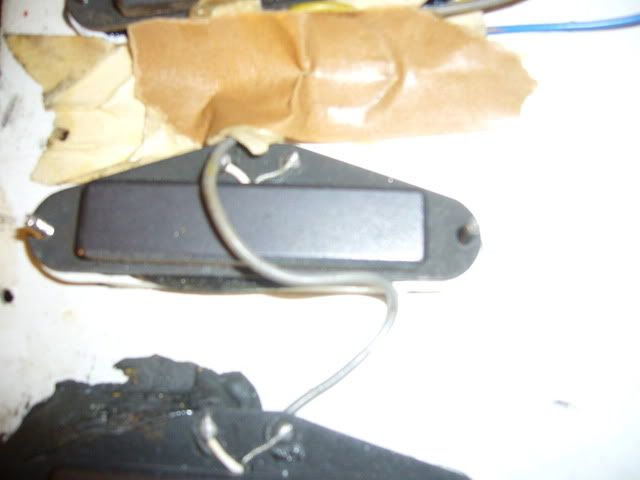
There were some questions whether this guard was original or not. I believe it is. The pickguard was originally a 2-ply black and white. I was able to scrape away some of the rolled on paint to find the white layer. The good news is the original knobs are here! The knobs and bridge will need some cleaning as they both have paint on them. I believe the pickups are original but with replacement covers. I have pictures below and would like some confirmation if anyone can tell me. I would also like to know if the original pots were mini-pots.

BODY Besides, the 4 layers of paint I am going to have to remove, the body is in good shape. I originally thought that I might be able to strip the paint back to the original black, but found this wouldn't be feasible. I have only found one bad spot so far in the body, a place on the lower end of the body where the original paint chipped off. There isn't really a bad ding in this spot though, it is smaller than a dime. The body is very heavy, and I don't doubt at this point that it is a maple body.

Pics to follow in the next post.


Top
 Profile  
 
 Post subject: Re: x140 rebuild
PostPosted: Mon Sep 12, 2011 6:46 pm 
Offline

Joined: Tue Jul 13, 2010 2:08 pm
Posts: 312
Location: Nashville, TN
ACTION

Upper Frets
Image

Bridge
Image

NECK

Headstock
Image

Cracks (hard to see in shot)
Image


BODY PICS

Controls
Image

Bridge Ground (aint that somethin')
Image

Front after light scraping
Image

Back after light scraping
Image

Bottom Profile after light scraping
Image


PICKUPS/ELECTRONICS

Silly Putty
Image

Pickup shot
Image


Top
 Profile  
 
 Post subject: Re: x140 rebuild
PostPosted: Mon Sep 12, 2011 6:58 pm 
Offline

Joined: Tue Jul 13, 2010 2:08 pm
Posts: 312
Location: Nashville, TN
Things done today:

received the guitar and inventoried the condition
disassembled guitar
cleaned paint/grime from the neck with steel wool
removed paint from neck plate
removed latex layer of paint - most of the guitar is at the gold or 2nd layer of paint (gold does not show right in pics)


Things to do next:

Purchase some paint stripper and apply to body
Sand body
Seal the body
Purchase primer and apply
Purchase lacquer and apply (any suggestions on color?)
Create pickguard (I have enough material here to create a new one and think I can get the shape right using the original)
Sort out electronics - If the pickups are original I'll keep them but will need new covers without holes. I still haven't determined how I want to wire this guitar. I may keep it original but there are other options available as well. I may make 2 pickguards as the good thing about this setup is the electronics are instantly changed to original with a pickguard and bridge ground wire swap.


Top
 Profile  
 
 Post subject: Wiring Diagram
PostPosted: Tue Sep 13, 2011 10:25 am 
Offline

Joined: Tue Jul 13, 2010 2:08 pm
Posts: 312
Location: Nashville, TN
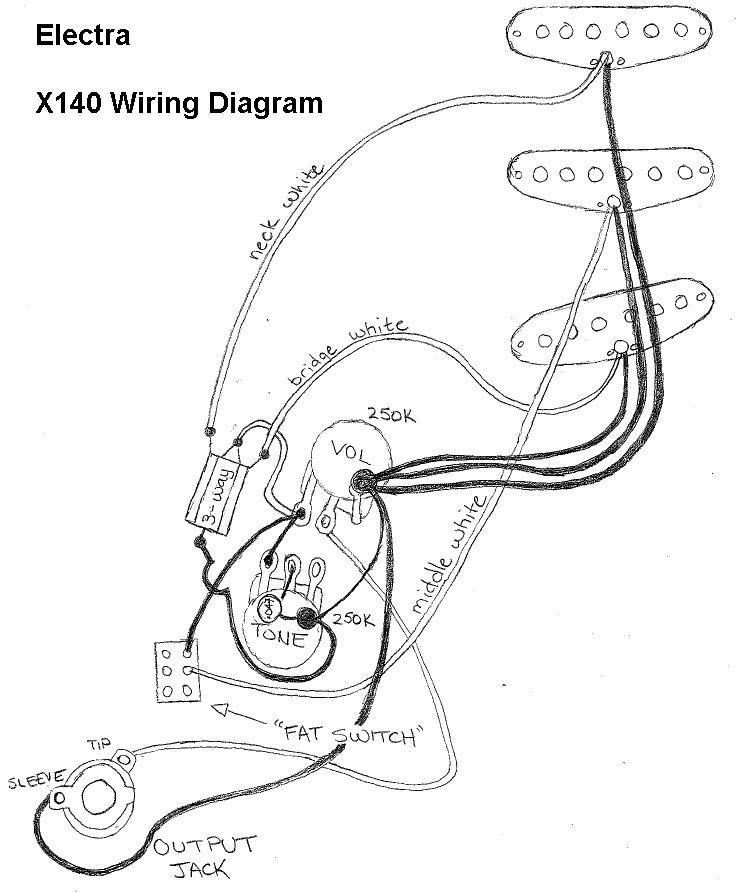
I had a few minutes here this morning and came up with the wiring diagram. Pardon my illustration, but it was done in a short time and I didn't feel the need to clean it up. Any comments are welcome. This was my best guess since I don't have an original diagram.

Image


Top
 Profile  
 
 Post subject: Re: x140 rebuild
PostPosted: Tue Sep 13, 2011 2:53 pm 
Offline
User avatar

Joined: Thu Feb 07, 2008 5:52 am
Posts: 1938
Location: Ann Arbor, Michigan
Image
Dude you're done! You're never gonna find another paint job like that, ever! Not sure what to tell you about the cracks on the neck finish, extreme temperature changes or moisture could possibly account for it, but who knows? It was all that globbing on the pickguard that threw me off, yeah, it looks original, not that it helps much. There is some weird extra shaving going on down by the bridge, so don't take it too literally when tracing it.

I see that the strings were threaded through the holes in the back of the bridge, but I prefer as much downforce as possible, and thats what the minor route under the bridge was meant for.

The wiring diagram looks right, although many people like to reverse the middle pickup to get that 'Oinky' out of phase tone, most strats are wired that way, just a suggestion. To be honest, I don't know if the pickup is wired in reverse, or if the pickup is Wound in reverse... you may need to experiment through an amp once it's strung up. Thanks for the 'Before' picks, we love to see how these things progress! Cheers, Mike.

_________________
Electra Guitar Videos ===> http://www.youtube.com/user/mjm33mjm?feature=watch


Top
 Profile  
 
 Post subject: Re: x140 rebuild
PostPosted: Tue Sep 13, 2011 3:55 pm 
Offline

Joined: Tue Jul 13, 2010 2:08 pm
Posts: 312
Location: Nashville, TN
I saw that extra route and I like you prefer the downward pressure, so much so that I'm going to make this a string through and I will be installing some ferrules to accommodate this. I believe the later versions of this were string-through? I used some furniture stripper today and found the original "top" pickguard holes. I also found some holes where a bigsby used to be installed. The surprises just keep on coming. I was able to remove most of the clear on the original finish and will be sanding tomorrow. I believe with the clear gone, the sanding will go a little easier. I found a couple of spots that need to be filled on the body but they are very small....sanding should be fun!


Top
 Profile  
 
 Post subject: Re: x140 rebuild
PostPosted: Wed Sep 14, 2011 1:33 pm 
Offline

Joined: Thu Jun 17, 2010 1:50 pm
Posts: 1569
Location: New Jersey
Sanding is not fun - I'd recommend a heat gun if you have one - it's 10X faster and and will leave you with just minor sanding. The X140 I had - had a crack right through the fingerboard - the finish on the board was fine/ok some spots just worn through. I can't tell if your pickups are original or not but I am fairly certain the original pots were mini's. I'm not much of a single coil guy but I really do regret selling the 140 I had. The sustain and resonance on that guitar was marvelous. Good luck on the project.


Top
 Profile  
 
 Post subject: Re: x140 rebuild
PostPosted: Wed Sep 14, 2011 3:28 pm 
Offline

Joined: Tue Jul 13, 2010 2:08 pm
Posts: 312
Location: Nashville, TN
Jead,

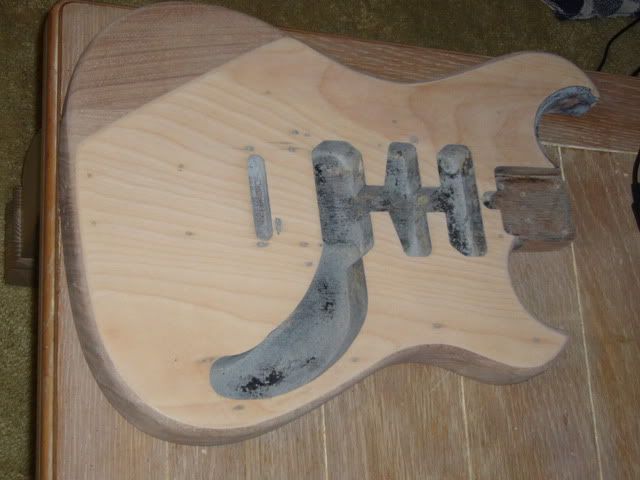
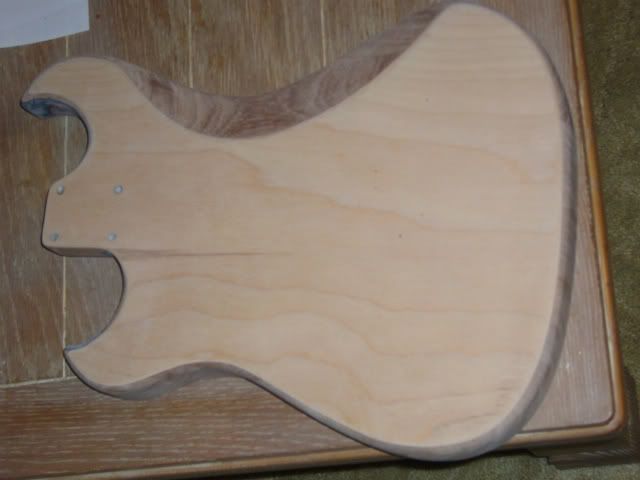
I wish I had a heat gun but I don't and the damage is done. I used stripper on it last night and this evening I started sanding. I didn't read the posts about stripper and a box until after I was done. I'm done with a rough sand of 60/80 grit with the exception of a small little spot on the horns. These horns are a B#@^&%$ and I ran out of time. :x The good news is the body is 1 piece. I don't know how common or rare this is with these models. In any case, I have pics below:

Image

Image


Top
 Profile  
 
Display posts from previous:  Sort by  
Post new topic Reply to topic  [ 39 posts ]  Go to page 1, 2, 3  Next

All times are UTC - 8 hours


Who is online

Users browsing this forum: Google [Bot] and 1 guest


You cannot post new topics in this forum
You cannot reply to topics in this forum
You cannot edit your posts in this forum
You cannot delete your posts in this forum

Search for:
Jump to:  
cron
Powered by phpBB® Forum Software © phpBB Group